
Reference the following link for the history and description of the quilling process.
Note that the quilling tool (slotted or T pin) described is not necessary. Quills can be made by wrapping paper around a toothpick.
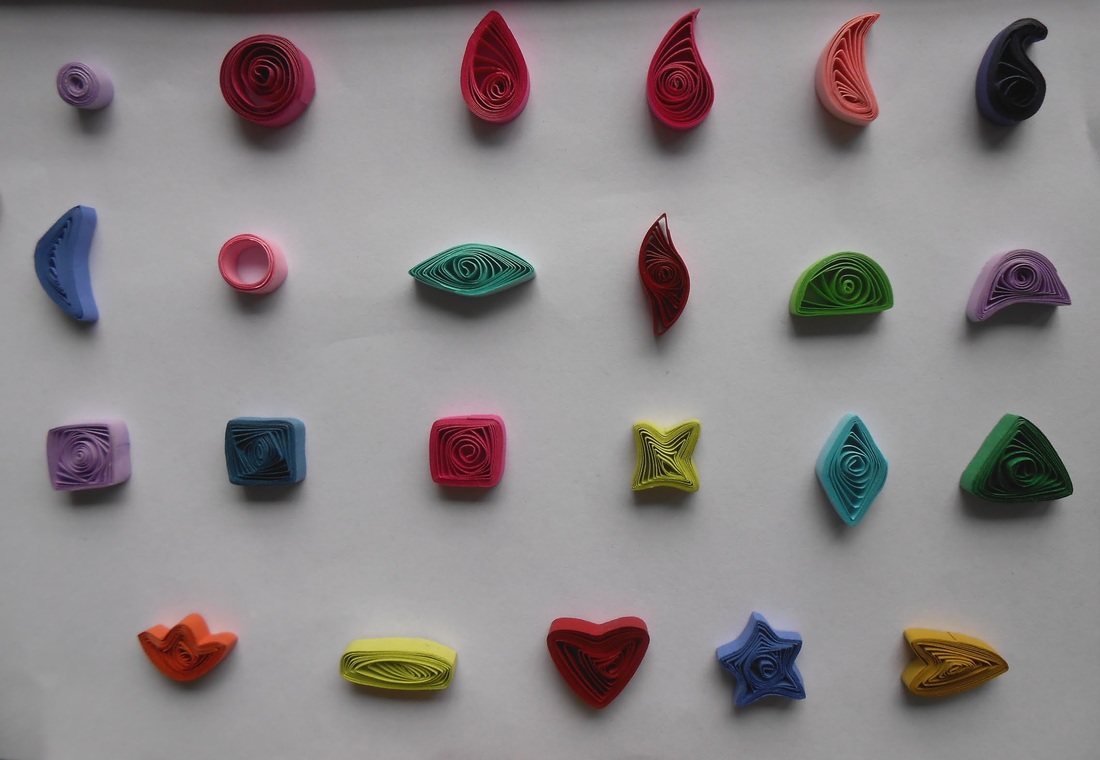
Next reference the chart below, and attempt to make one of each of the various types of quills.
Now search images for quilling to get some ideas and draw two concepts in your sketchbook. Discuss these with the teacher then draw them to scale. Consider making your quilled project...
Note that the quilling tool (slotted or T pin) described is not necessary. Quills can be made by wrapping paper around a toothpick.
Next reference the chart below, and attempt to make one of each of the various types of quills.
Now search images for quilling to get some ideas and draw two concepts in your sketchbook. Discuss these with the teacher then draw them to scale. Consider making your quilled project...
- with different widths of strips of paper to create different levels
- you may want to have your project be 3D and not be attached to a background.
- try gluing the individual quills to one another before attaching the finished project to the background.
| quilling_rubric.docx |
 RSS Feed
